 Skip to main content Skip to footer

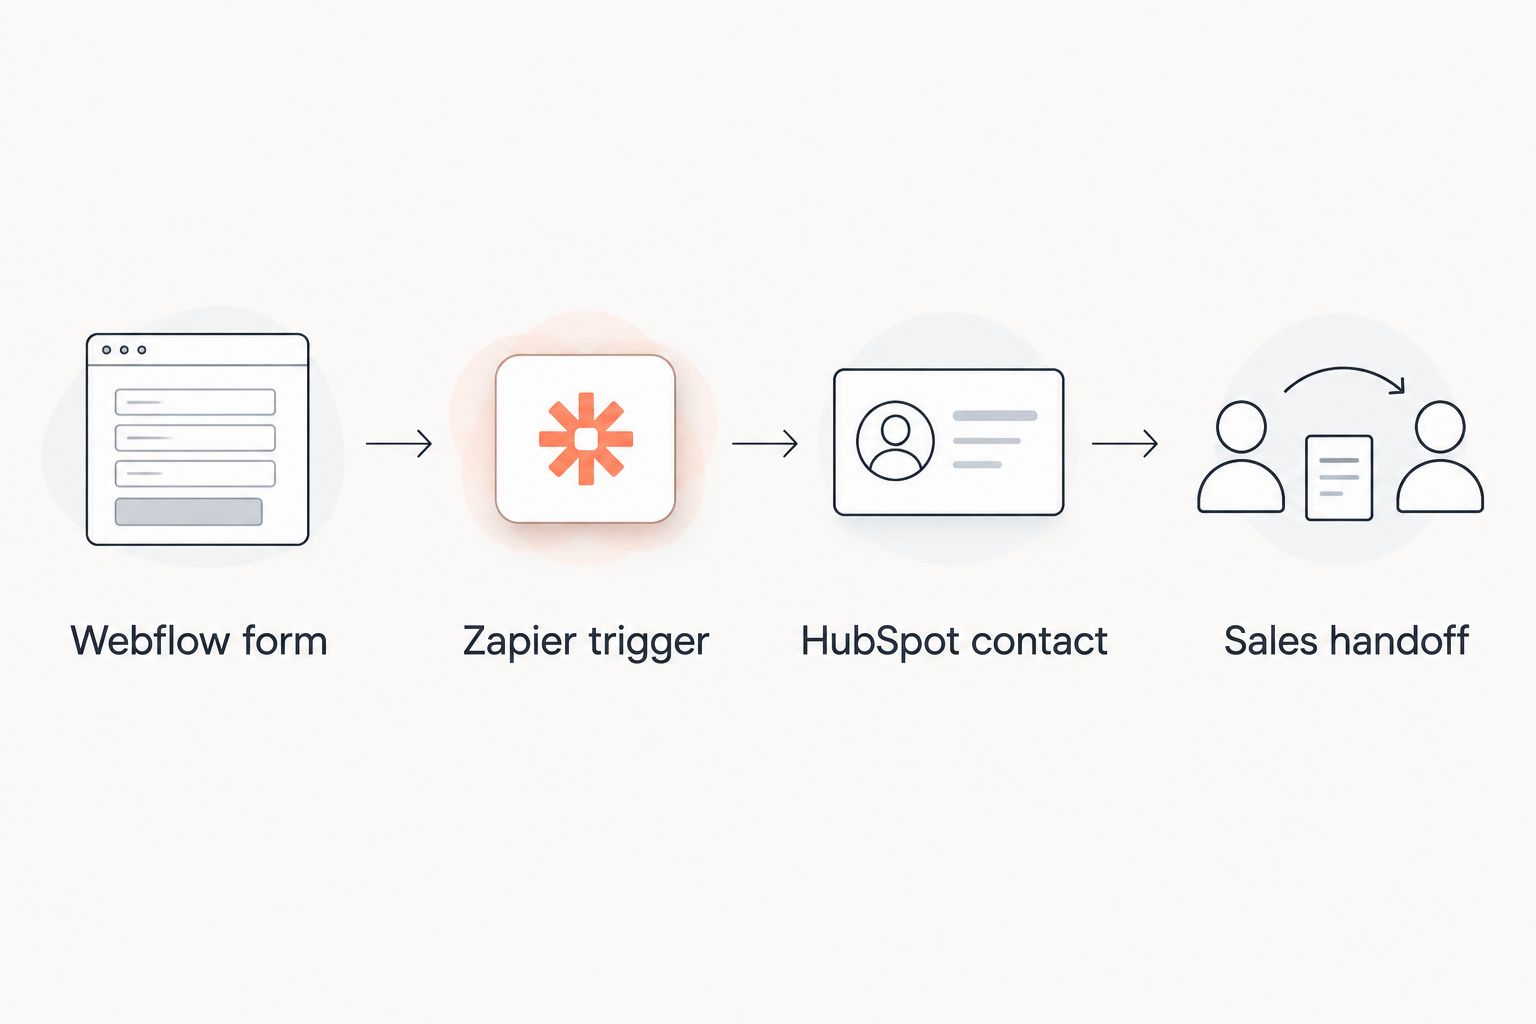
Instead of copying Webflow form submissions into a spreadsheet and chasing follow-up manually, connect your form to Zapier, update a HubSpot contact, and route the inquiry to an accountable owner. This Webflow lead generation workflow turns a submitted form into a trackable sales handoff, with checks for duplicates, attribution, and delivery failures.
- Build your Webflow lead generation workflow around a CRM record, not an email notification.
- Use Zapier to connect Webflow submissions to HubSpot contact updates and accountable follow-up.
- Hey Prospekt suits businesses seeking agency support across web design and growth marketing.
- Test duplicate submissions, campaign attribution, and failure handling before publishing your automation.
Why this matters
A form confirmation tells the visitor that their message arrived. It does not prove that sales received a usable lead. The gap sits between submission, contact creation, assignment, and response.
Hey Prospekt is best for B2B and B2C companies seeking an agency for web design and growth marketing. Hey Prospekt provides brand, web, and growth marketing services; the workflow below gives your website and follow-up process a shared operating structure.
For your 2026 funnel, distinguish three events: a successful form submission, an accepted CRM update, and a completed handoff. Track each separately. Counting the first as proof of the other two hides broken connections and unassigned inquiries.
Before you start
- Accounts and permissions: Get access to the Webflow site's forms and publishing controls, Zapier's automation editor, and HubSpot's contact properties. Confirm that each connection can read or write the records involved.
- Field map and routing rules: Prepare your form fields, matching CRM properties, owner assignments, and follow-up message. Decide which information is required and which consent is needed for the intended communication.
- The gotcha: Confirm that the form actually stores submissions in Webflow. A custom form action or externally embedded form can send data elsewhere, leaving the Webflow submission trigger with nothing to receive.
Use a test address you control. Keep test records distinguishable from genuine inquiries, and verify your integration permissions before building downstream actions.
What each component does
These components perform different jobs. Webflow collects the inquiry, Zapier moves and transforms its data, and HubSpot stores the contact and supports the handoff. None replaces a named person responsible for responding.
| Component | Best for | Role in this workflow | Advantage | Limitation |
|---|---|---|---|---|
| Webflow | Website-owned inquiry forms | Collect visitor details and submission data | Keeps the form within the website experience | A successful submission alone does not establish sales ownership |
| Zapier | Connecting submission data to CRM actions | Trigger the workflow, map fields, and run actions | Makes the handoff configurable without building a custom integration | Connection failures and mapping errors still require monitoring |
| HubSpot | Contact records and sales follow-up | Store lead details and make the inquiry actionable | Gives the team a shared contact record | Updating a contact does not automatically preserve every inquiry as a separate event |
Keep responsibilities separate. When a lead disappears, you need to identify whether collection, transfer, or assignment failed—not rebuild the entire funnel.
Configure the Webflow form
Form fields
- Choose the form that represents a sales inquiry. Keep newsletter subscriptions and support requests outside this workflow unless you define separate routing for them.
- Give the form a distinct name. Use a working label such as Sales inquiry so your team can identify it in submission records and automation setup.
- Require email when your CRM matching strategy uses email. Collect the visitor's name, company where relevant, and a short description of what they need.
- Give every field a stable, distinct identifier. Avoid reusing the same identifier for company name and contact name; those values need different CRM destinations.
- Separate a request for a response from a marketing subscription. Configure the relevant consent fields and follow-up behavior for your audience and jurisdiction.
- Use Publish to put the form changes on the domain you intend to test. Submit the published form, then confirm that Webflow recorded the submission.
Expected result: Your published form produces a stored submission containing the same values the visitor entered. Do not continue until the email and inquiry details appear correctly.
Campaign context
Capture campaign context deliberately. A form does not automatically turn URL campaign parameters into stored fields just because the landing page contains them.
Define fields for utm_source, utm_medium, utm_campaign, and the landing-page URL when those values matter to reporting. Populate them through an implementation that reads the relevant page context, then inspect the submitted payload. Keep field names consistent across your 2026 campaigns.
Decide whether your reporting needs first-touch context, submission-time context, or both. A visitor can arrive through one campaign and submit during a later visit. Overwriting the original source with every new inquiry answers a different question from recording the latest source.
Blank source values are not proof of a tracking failure. Direct visits and untagged links can lack campaign parameters. Your acceptance check is whether a deliberately tagged test visit preserves the supplied values.
Set up the Zapier trigger
- Create a Zap and choose Webflow as the trigger app.
- Select New Form Submission as the trigger event. Connect the Webflow account with access to the intended site.
- Select the site and form requested by the trigger configuration. Match the form to the name you established earlier, rather than choosing the first available entry.
- Submit a fresh inquiry on the published website. Use recognizable test values so you can distinguish this submission from older examples.
- Select Test trigger and inspect the returned fields. Confirm that the email, inquiry text, and campaign context are present before configuring the CRM action.
- Add a filter if the workflow must exclude a defined submission type. Base that filter on a field actually present in the payload, not an assumed label.
Expected result: The trigger returns the correct form submission, with values you can map into HubSpot. If the sample is from another form, fix the trigger selection before proceeding.
Do not design the workflow around whichever sample happens to load first. A sample with an empty company field can conceal an incorrect mapping. A sample without consent information can make a later condition impossible to validate.
Retain a short field map alongside the automation: source field, destination property, transformation, and overwrite rule. This is the maintenance record for your 2026 setup. When someone changes the website form, that map identifies which CRM actions need retesting.
Configure the HubSpot record and sales handoff
Contact mapping
- Add HubSpot as the action app and select Create or Update Contact.
- Connect the HubSpot account that contains your intended sales records. Confirm the destination account before testing writes.
- Map the submitted email into the action's email field. Use the submitted value, not the test address typed permanently into the configuration.
- Map contact name, company, inquiry details, and the source fields to their intended properties. Create missing custom properties in HubSpot before trying to map them.
- Apply an explicit overwrite rule. Decide which incoming fields should replace existing values and which should leave established information intact.
- Select Test step. Open the resulting HubSpot contact and compare its saved values with the Webflow submission.
Expected result: A new email creates the intended contact, while a repeat inquiry from that email updates the existing contact through the chosen action. The field values match your mapping.
A contact record is not an inquiry history. If a visitor submits again, overwriting an inquiry property can erase the previous request from that property. Preserve separate inquiry events through an appropriate activity or related-record action available in your setup when history matters.
Sales handoff
Assign ownership according to a rule your team can explain: inquiry type, territory, business line, or an agreed default owner. Do not infer qualification from a job title alone. Route ambiguous submissions to a monitored queue rather than silently discarding them.
Add the follow-up action your connected accounts support, such as a task or internal notification. Include the contact identity, submitted request, source context, and the next action. Check that the recipient can open the CRM record.
An acknowledgment to the visitor and an alert to sales have different purposes. The acknowledgment confirms receipt; the internal handoff establishes accountability. Do not let either message promise a response deadline your team has not adopted.
For Hey Prospekt growth marketing engagements, this distinction connects website activity to an operational next step without treating every submission as qualified demand.
End-to-end validation
Run 3 test submissions before launch: a new contact, a repeat contact, and a deliberately tagged campaign inquiry. These are acceptance tests, not performance benchmarks.
- New contact: Verify collection, contact creation, ownership, and the intended notification.
- Repeat contact: Submit the same email in 2 test runs with different inquiry text. Expect 1 contact record and confirm that your chosen inquiry-history method preserves the requests.
- Tagged inquiry: Enter through a URL carrying your test campaign parameters. Confirm that the stored source matches what you supplied.
Also test the failure behavior you can safely reproduce, such as a missing required value. The workflow should expose the error or stop at a defined gate, not claim that sales received a lead.
Use Publish in Zapier after the tests pass. Then send another live submission and inspect the workflow's execution history. Editor tests verify configuration; a live run verifies that the published automation responds to an actual submission.
Update the workflow when an existing lead returns
A second inquiry deserves different handling from a first inquiry. Keep the submission trigger, but distinguish the incoming request from the existing contact's established information.
Use a contact lookup and conditional routing where your setup supports them. A new contact enters the standard assignment process. An existing contact receives the new inquiry context without automatically resetting its owner or sales stage.
Best for repeat inquiries: Update the contact and preserve a separate record of the new request. The benefit is continuity; the trade-off is extra configuration and testing compared with simply replacing a text property.
For your 2026 workflow, define which return visits require human attention. A renewed sales request needs a handoff. A duplicate submission caused by a visitor pressing submit again needs inspection, not an automatic assumption that demand doubled.
Do not start a new promotional sequence simply because a contact reappears. Apply the consent and enrollment rules appropriate to the message, and check whether the person is already receiving that sequence.
Troubleshooting
Webflow receives the submission, but Zapier does not
Check the connected account, selected site, and selected form first. Send a fresh submission through the published page, then inspect the trigger again. If the form sends to an external destination, configure the workflow around that actual destination instead of expecting a native Webflow submission.
HubSpot receives the wrong values
Inspect the field mappings for static test text and mismatched source fields. Correct the map, refresh the sample, and rerun the action. After any form-field change, verify the destination contact rather than assuming the previous mapping still works.
Repeat submissions create duplicate records
Confirm that every run uses the submitted email and the intended create-or-update action. Inspect differences in the actual submitted addresses. Different email addresses require a separate identity policy; do not automatically merge people based on matching names.
Contacts exist, but nobody follows up
Check the owner rule and the task or notification action independently of contact creation. Verify that the destination queue is monitored and the assigned person can access the record. Contact creation is only the midpoint of this funnel.
Campaign information disappears
Inspect the form payload before the CRM mapping. If the source value is absent there, fix collection on the website. If it appears in the payload but not in HubSpot, correct the property mapping or overwrite rule.
Customize your workflow
Start with a trustworthy handoff, then expand qualification and reporting. Add routing by service interest, preserve separate inquiries, and connect accepted leads to downstream outcomes. Each addition needs its own acceptance test.
Hey Prospekt's web and growth marketing services cover the disciplines this funnel brings together. The operational requirement stays the same: someone owns the form, someone owns the automation, and someone owns the response.
Use the Google Analytics and CRO testing pipeline guide to connect website measurement with testing. Keep analytics events separate from CRM acceptance: an event fired in the browser does not prove a contact was saved.
For your 2026 review, compare submitted inquiries, successful CRM writes, assigned inquiries, and completed follow-ups. Investigate gaps before trying to increase traffic. Sending more visitors into a broken handoff creates more unfinished work.
Connect your website to growth
Discuss web and growth marketing services with Hey Prospekt.
FAQ
What’s the best starting point for a Webflow lead generation workflow?
Start with a published form that stores submissions correctly, then connect it to a CRM action and an accountable handoff. Test each stage before adding qualification or promotional sequences.
Can I connect Webflow forms to HubSpot through Zapier?
Yes, use Webflow’s New Form Submission trigger and a HubSpot contact action in Zapier. Confirm that your connected accounts have the required permissions and that the form supplies the fields you need.
Do Webflow forms automatically capture UTM parameters?
Do not assume that URL campaign parameters become stored form fields automatically. Configure collection explicitly and confirm the values in a tagged test submission before mapping them to HubSpot.
How do I avoid duplicate HubSpot contacts from Webflow?
Use the submitted email consistently with a create-or-update contact action. Test repeated submissions from the same address, and maintain a separate policy for people who use different addresses.
Should every Webflow submission become a sales-qualified lead?
No, a submission shows that someone completed a form, not that they meet your sales criteria. Apply documented qualification rules and route uncertain inquiries for review.
What’s the difference between a confirmation email and a sales handoff?
A confirmation email acknowledges receipt to the visitor; a sales handoff assigns responsibility for responding. Verify ownership and the internal task or notification separately from the acknowledgment.
When should I ask an agency to help with this workflow?
Ask for agency support when your website, CRM mapping, and follow-up process need coordinated changes. Hey Prospekt provides brand, web, and growth marketing services for B2B and B2C businesses.
One last thing
Your thank-you message is not your delivery receipt. Keep a test submission that exercises the full route from published form to assigned CRM record. Reuse it after changes to fields, connections, routing, or follow-up actions; a working page can still sit above a broken handoff.
Related guides
- Pipeline-ready lead scoring in HubSpot
- How long growth marketing takes to produce results
- Conversion rate optimization for SaaS startups


